How To Manage Invoice Schedules & Invoice Scheduling Groups
Required User Rights
To be able to use these functionalities, you’ll need at least the following user rights:
- 3512 Menu – Invoice Scheduling
- 3575 Menu – Invoice Schedule Groups
- 3576 Menu – Run Schedule Now
What Is Invoice Scheduling
Invoice scheduling generates invoices from charges that haven’t been invoiced yet. Once the invoices are generated, the charges are marked as invoiced (closed from being invoiced again).
Invoices are generated for all the organizations that are under the organization level selected in the schedule. This includes the organization itself and all organizations below it in the hierarchy.
Example: To invoice all your customers on the same day, you can simply create one schedule on the seller organization level and organizations under it in the Organization Tree will be invoiced.
Example: In case a single customer needs a specific invoicing schedule, you can create a schedule for just that one organization.
Note: Once an invoice schedule has run, the charges for all associated organizations will be marked as invoiced and can’t be invoiced again. It is recommended that you use either the “All Customers Method” or the “Single Customer Method”, because you can’t run both simultaneously for the same organization.
In addition to the organization, the schedule controls the time period in which yet to be invoiced charges are included. The charges for the given period (and possibly older) yet to be invoiced charges (from a period of 18 months) are added to the invoice.
Example: You can write explicit rules to select specific products if you need to split part of your sales into a separate invoice.
Invoicing Scheduling Dashboard
To manage invoice schedules, go to Billing and select Invoice Scheduling from the drop-down menu.
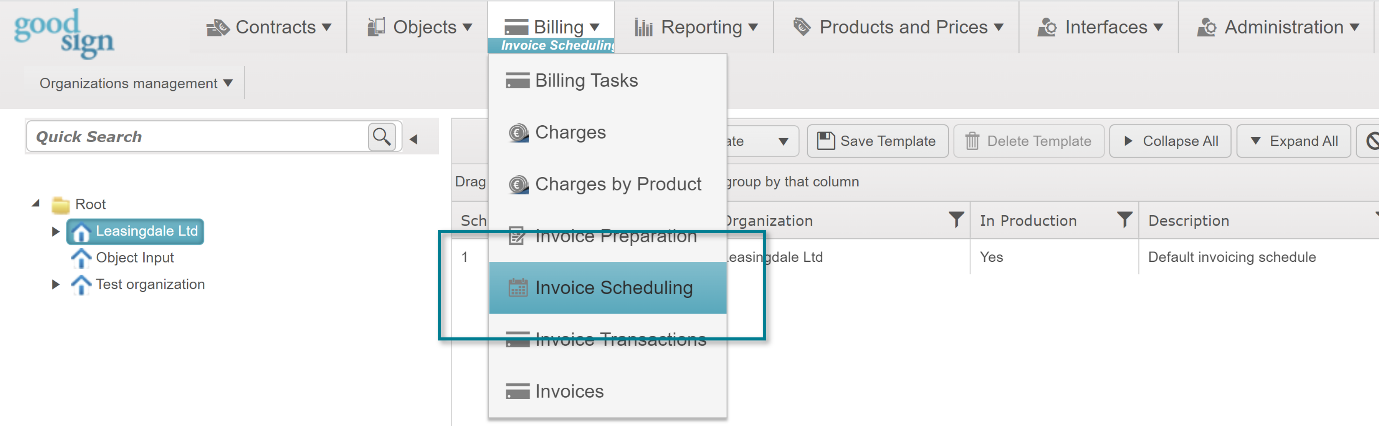
Figure 1: Route to Invoice Scheduling
Once there, you’ll use the Management menu in the top-right corner to perform different actions.
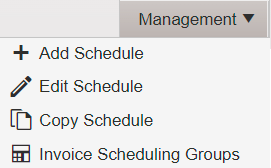
Figure 2: Management menu
The dashboard is arranged by organization, and you can choose the desired organization from the Organization Tree on the left.
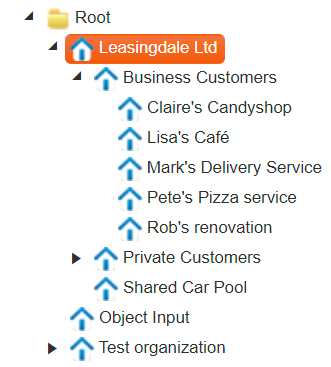
Figure 3: Organization tree
Add Schedule
If you wish to add an invoice schedule, go to Billing > Invoice Scheduling and from the Management menu, choose Add Schedule. The window in Figure 4 will open.
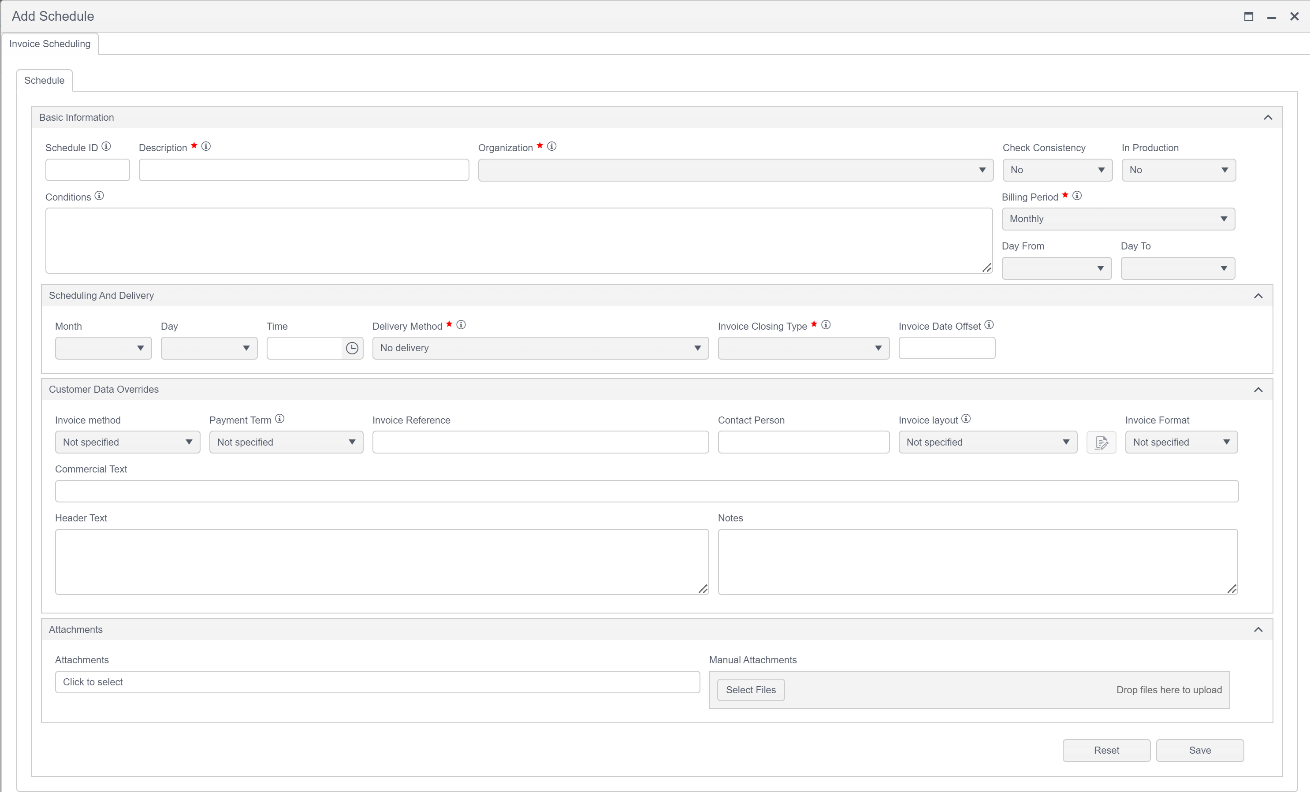
Figure 4: Add Schedule
How to Fill in the Fields
When adding an invoice schedule, some fields are mandatory to fill. Most of them have been marked with a red star, but Time is also mandatory for the schedule to eventually run. Unless all these fields have been filled, the schedule can’t be saved. Below is a list of fields in the scheduling form:
- Description (mandatory) – The description of the invoice schedule that separates it from other schedules. Use a description that best helps you to identify the purpose of the schedule (example: “End of the month consulting work invoicing”)
- Organization (mandatory) – Enter the desired organization. Remember to utilize parent organizations to allocate the schedule to all the organizations under the chosen organization in the Organization Tree
- Check Consistency – Needs to be configured. If Yes is chosen, a separate dropdown menu will open to give further options. Consistency checks are automated actions to identify deviations in invoicing. For example, it can prevent the automatic sending of an invoice if it significantly differs from the customer’s past invoices of the same services:
- In production – If No is selected, the schedule is not in use.
- The value Once creates a one-time schedule, which is run once and then automatically removed.
- Conditions – Used for setting additional conditions that determine which charges to include in the invoices created by the invoice schedule. If left blank, all charges found for the billing period will be included.
- Billing Period (mandatory) – Selects the time period that’s invoiced.
- Day From and Day To – Determines which days will be invoiced, if the entire month is not invoiced. Example: If several months are invoiced, you can select that only the 10th-20th days are selected.
- Month, Day, and Time (mandatory) – Enter the desired execution time for the schedule. If the month field is left empty (and there is a day and time), the invoices will be delivered each month on a certain day and time. If only the time field is used, the invoice delivery will take place daily.
- Time – Enter the time you wish to send the invoice. The Time field is in your client’s time.
Tip: Quarter-delivery can be utilized by creating multiple schedules and using the month field.
- Delivery Method (mandatory) – Defines what will happen to the invoice during delivery:
- Invoice – Invoices are generated and will be sent automatically.
- Cost – Cost invoices for accounting purposes.
- Invoice-hold – The invoices are generated but not sent (so user then manually sends after checking).
- No Delivery (default) – Closes charges but does not generate invoices. This is used for informing the accounting (e.g., about internal invoices or zero invoices).
- Invoice Closing Type (mandatory) – Allows using charges to close several invoices (customer, reseller, cost). Not available for Essentials/Advanced.
- Invoice Date Offset – Used to adjust the invoice date forwards or backwards in full days. This offset is calculated at the time of sending of the invoice. Use integer values (...-2, -1, 1, 2...). If left blank, the invoice date will be the invoice sending date.
Customer Data Overrides
Custom data overrides are a forced action only used for overriding the data from the basic information of the customer organization. It can be used to override the following information:
- Invoice Method
- Payment Term
- Invoice Layout
- Invoice Format
- Commercial Text
- Attachments
- Manual Attachments
- Additional Reports:
- Contact your Good Sign Contact Person if you need more information or have report needs.
Edit Schedule
To edit an invoice schedule, go to Billing > Invoice Schedule. Choose the schedule you wish to edit. From the Management menu, click on Edit Schedule. You will now be able to edit the desired schedule. Once you’re done editing, press Save and close the window.
Invoice Schedule History and Charges
If you wish to see the change history of the invoice schedule, go to History in Edit Schedule. The charges utilized in the schedule can be seen in the Charges tab.
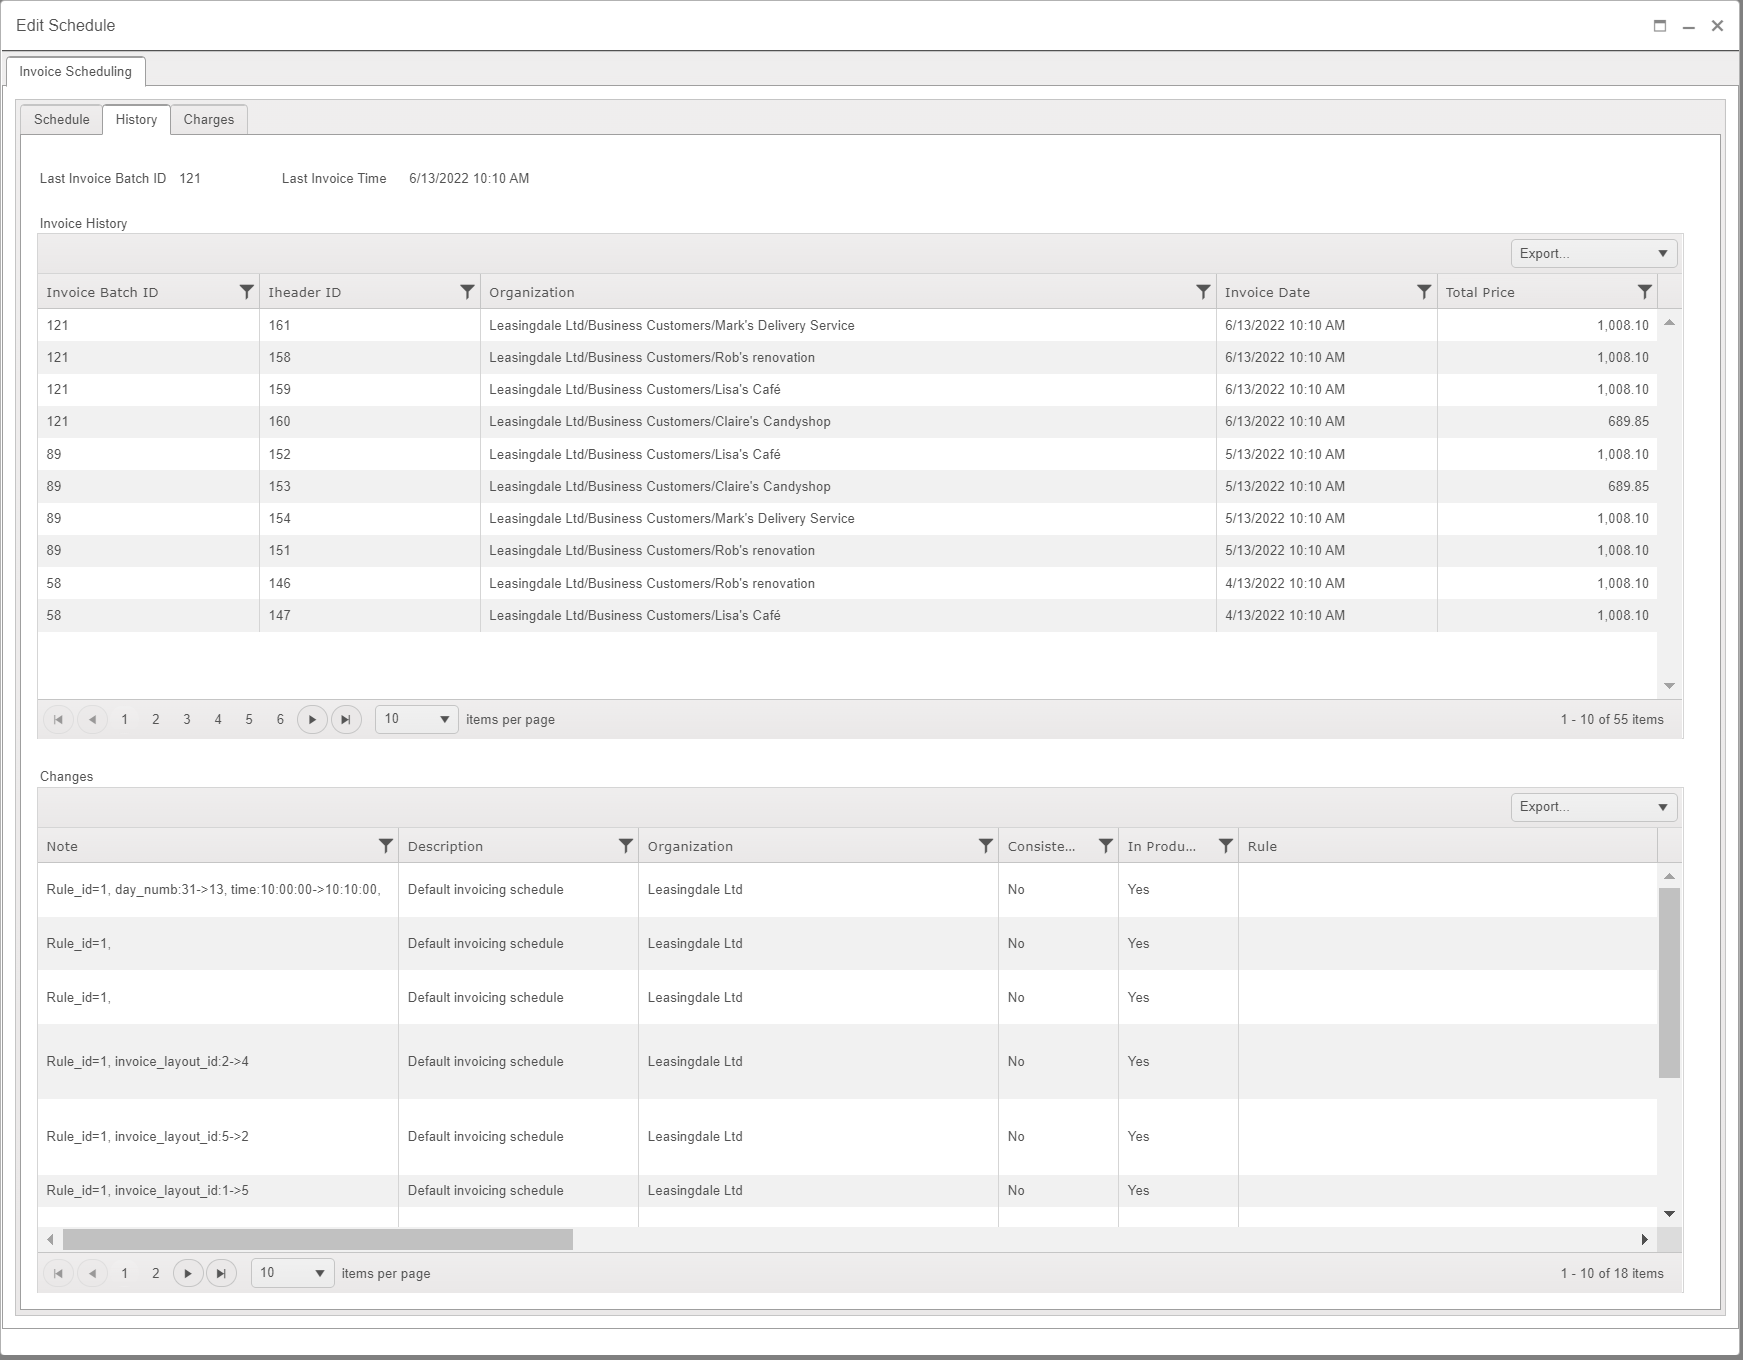
Figure 6: The change history of an individual Invoicing Schedule
Copy Schedule
To copy a schedule, you need to go to Billing > Invoice Schedule. Choose the schedule you wish to copy. From the Management menu, click on Copy Schedule. You will now be able to copy the desired schedule.
The fields in the form that are marked with a red star are mandatory. Once you’ve sufficiently filled the copied schedule, press Save. Once you’ve saved the copy, you can close the window.
Invoice Scheduling Groups
You can close charges of scheduled invoices that are in hold, by using invoice scheduling groups. The closing can be organization-specific or can be done in a more generic way by closing multiple organizations’ invoices e.g., for a specific period. The charges for the given period and possibly older charges that have yet to be invoiced (from a period of 18 months) are added to the invoice.
To make a new invoice scheduling group, you need to:
- Go to Billing > Invoice Schedule.
- From the Management menu, click on Invoice Scheduling Groups.
- A new window opens, where you can create new invoice scheduling groups. Write a Description and Comment for the group.
- Click Save.
- Once you’ve pressed Save, you’ll be able to add rules to the group.
- Choose a rule and press Add. The rule will be added to the group’s current values.
If you wish to delete a rule, just choose it from the Current Values and press Delete. Once you’re done, you can close the window.
Run Schedule Now
The Run Schedule Now function enables instant, manual running of a single invoice schedule, without having to make changes to the schedule.
Example: Run Schedule Now can be used when an invoice must be deleted and then recreated, or data and charges have arrived later than usual and weren’t available during the regular schedule running time.
When using Run Schedule Now, the schedule is run instantly, so Month, Day, and Time information is ignored. If the schedule you are trying to run has In Production set to No, a prompt for overriding it appears before the schedule can be run. Running the schedule with Run Schedule Now will not change the original Month, Day, or Time values.