How to Manage Users & Logins in Good Sign
This guide will explain the basic functions of user management and how to manage login credentials.
Required User Rights
Please note that in order to create users and user accounts you need to have sufficient rights in your own account. In case rights need to be extended, please contact your admin user or your service portal.
What is a User
Typically, in Good Sign, a user represents a person that is connected to an organization. Having users defined may be relevant if for billing purposes there is a need to have more granular control. For example, if your services contain assets such as computers, the computer may be linked to the specific user of that computer.
In Telecommunications, user is the person the phone number belongs to.
A defined user can also be granted a login to Good Sign. You cannot generate a login before creating the user.
User Dashboard
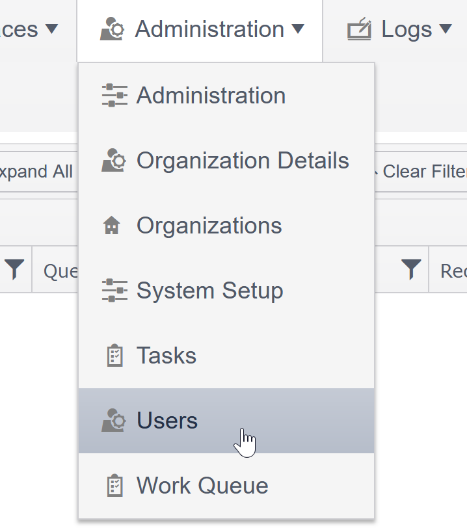
Users can be seen by clicking Administration > Users. The view will show all the users that the organization has. The organization level can be selected from the organization tree on the left. If you wish to see all users at once, remember to choose the Root level.
In this view you can organize and filter user data according to your preferences. Before creating a new user, you should always make sure that the user does not already exist in the system. Whenever a new organization is created, a default “user” is created for the organization. This user does not have a first name and last name is the name of the organization. These should generally never be deleted.
Please note that creating login credentials is a two-step activity which starts by creating the user. This step alone does not grant any rights to the system, but the login information have to be added separately.
How to Add a User
The Lastname field is the only mandatory field, but it’s advised to fill in Firstname, Email and mobile phone number (GSM/ number) as in the picture below. The phone number is especially important if you later want to add login credentials, as logging in requires an additional one-time password sent via text message.

Once you have filled the necessary fields, click Save. Now the user has been created and you can see it in the main user view after updating it.
How to Create a Login for a User
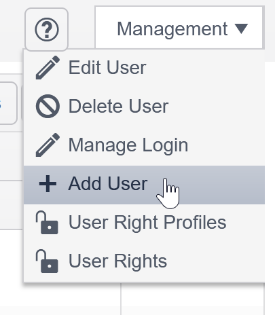
After creating a user, adding a login for that user is quite simple. In the User view, activate the row of the person you want to add credentials to. On the upper right corner under Management choose Manage Login and a new window opens.

User Organization is inherited directly from the user, and it can’t be changed. Home Organization, however, is editable – the default value is given based on what organization the user is on. Also, Name, Email address and Mobile number are also prefilled with this information. Access Right Profile must be chosen from the drop-down menu (see Figure 6).
The only relevant default user right profiles are User Profile: Admin and Auth User Management – All Rights. These both give extensive rights in Good Sign, but only on the organization level that is defined in Home Organization drop-down menu.
Basic settings are also recommended to assess to make sure that language (English by default, Finnish as an option and culture code (affecting date and time formats, options English/Finnish).
The Default Landing Page doesn’t need to be changed but the possibility exists. The same applies for the Portal Theme and that can also be changed by the users themselves, so no changes are necessary.
Once you have filled all the mandatory fields, click Save and the system will ask for confirmation; Are you sure you want to add this login? Click Yes and the system will confirm that the login has been added successfully.
After the user account has been created, an email with the title New Login is sent to the email address of the account owner. An SMS message containing the password is also sent to their mobile phone number.
How to Edit User Information
Editing user or account information may be necessary if e.g., email address or phone number change. Please note that the login name can’t be changed afterwards. If it is necessary to modify that, you must remove the existing account and create a new one.
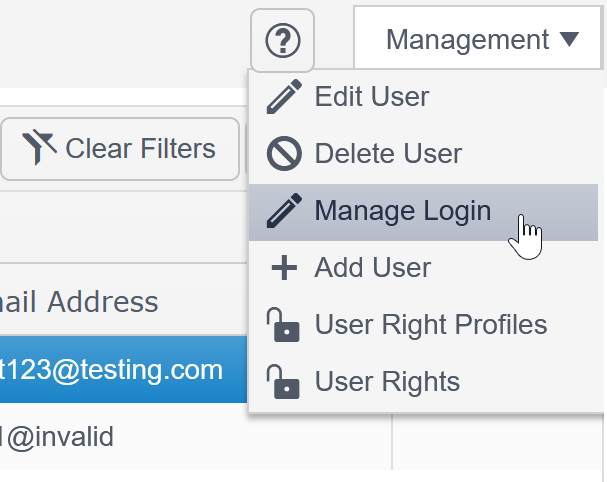
Click on the user and choose Manage Login and the Edit Login window opens. Change the information you want in the previously mentioned Basic Information and Basic Settings sections.
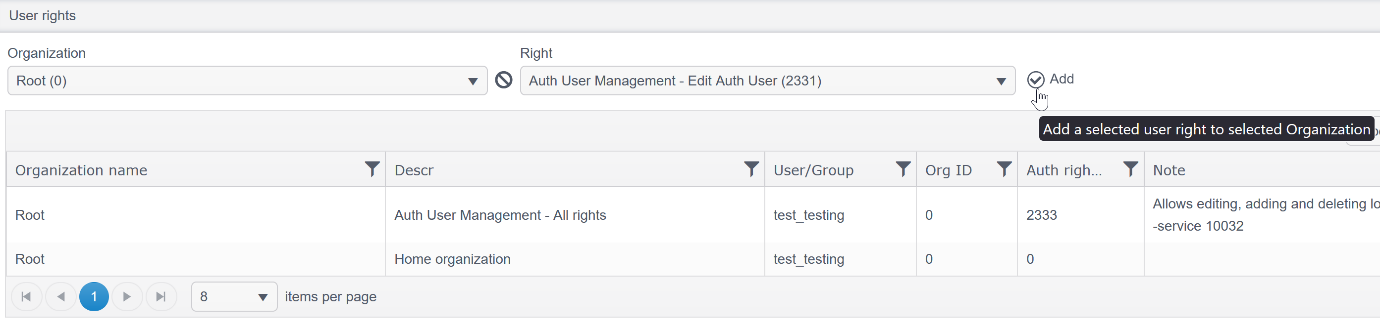
If you want to edit user rights, choose the User rights section at the bottom of the window (see Figure 7). Choose the correct Organization and User Right from the drop-down menus and click Add and once you are done, click Save.
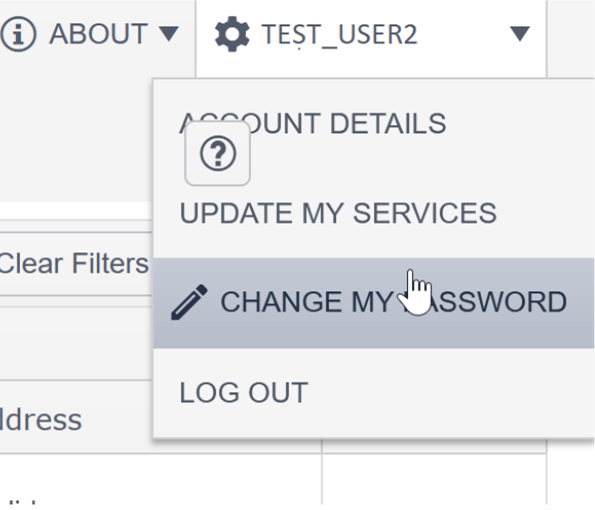
How to Change Your Password
When logged in to Good Sign, a user can always change their password from the upper right corner under their account name by choosing Change my password.
If you can’t change your own password, your admin user can change it for you. This requires adequate user rights of course.
Another user’s password is changed by navigating to the Manage Login window and selecting the other sheet Change Login Password.
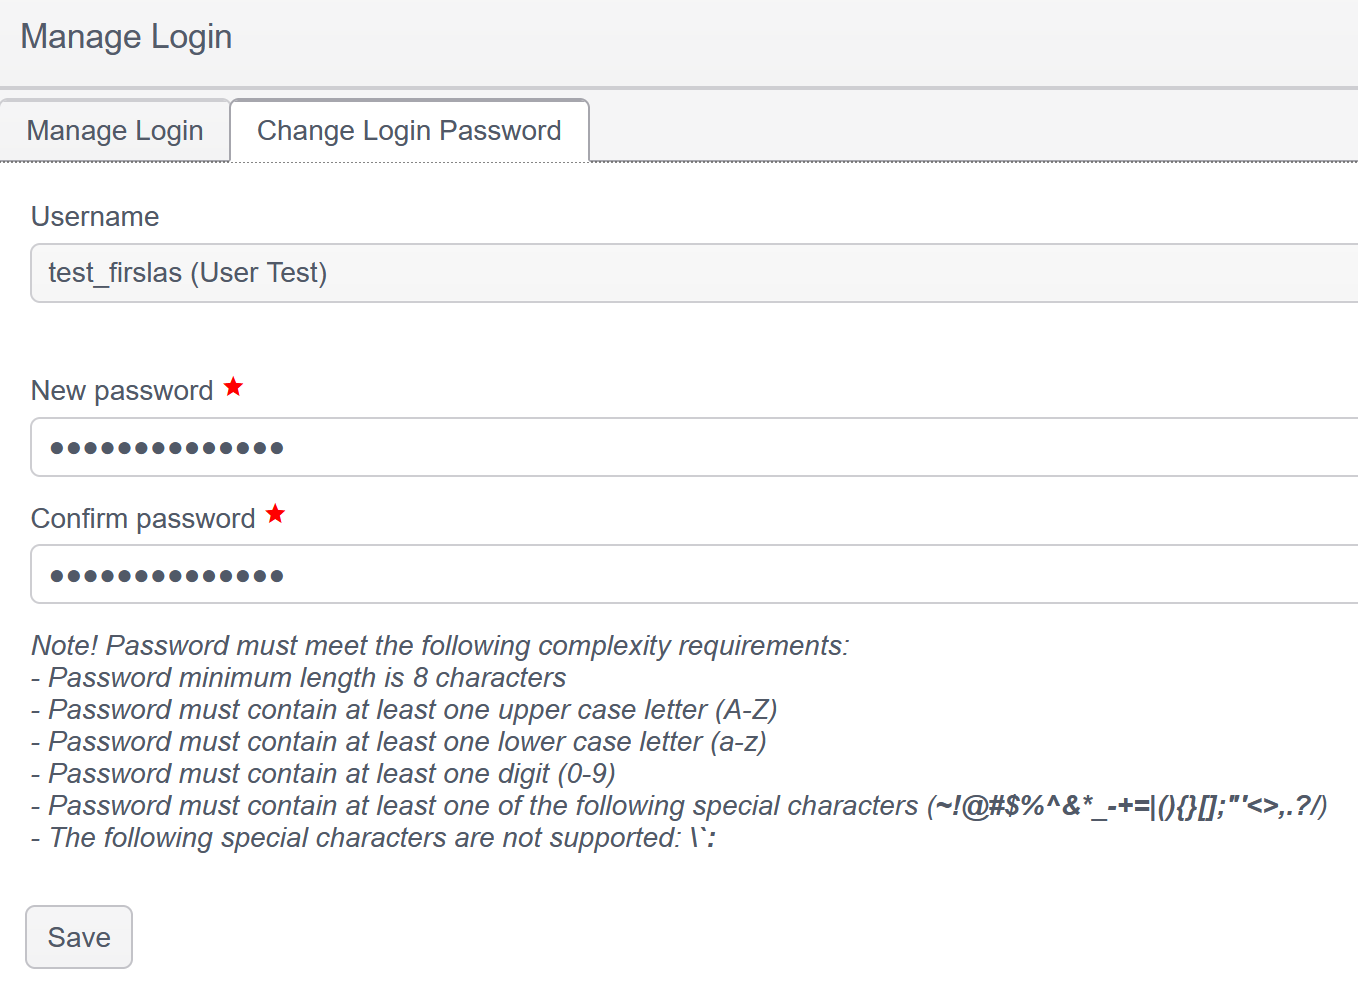
Figure 9: Changing another user's password
Make sure the Username is the user’s you want to edit and create a new password following the requirements and click Save.
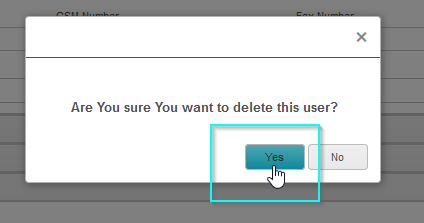
How to Delete a User
User account deletion removes the login and any user rights the user had. To delete a user account, follow the following steps:
- Go to Administration > Users
- Choose the correct Organization
- Click on the user you wish to delete
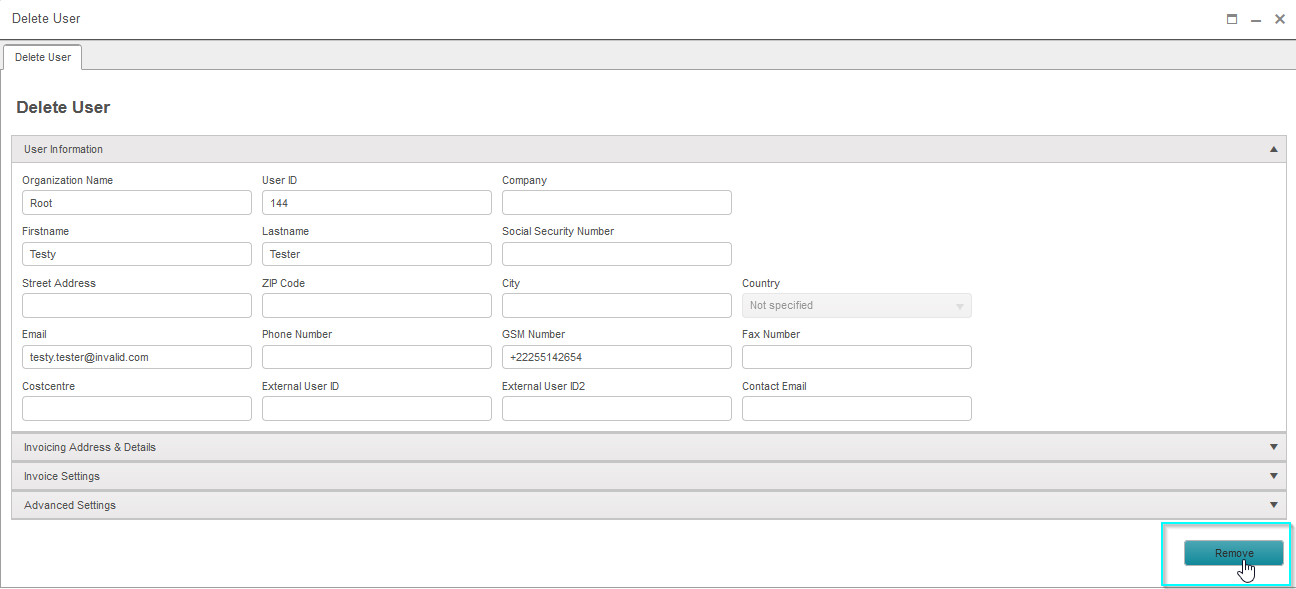
- Choose Delete User from the Management menu

5. Click on the Remove button
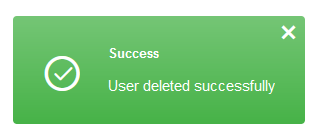
Note! Even after the login has been deleted the user information still exists but they can no longer log in to Good Sign. A deleted user can be recognized from the 1 in the Deleted column

Figure 14: Deleted column